
Five steps from sign-up to a working proxy: get bandwidth, copy your login from the dashboard, and send one test request.
1. Create an account and add bandwidth
Sign up at panel.proxyempire.io. The quickest start is the $1.97 trial: 100 MB of Rotating Residential and 50 MB of Rotating Mobile bandwidth. It is a one-time payment, it activates at once, it needs no KYC, and the bandwidth never expires. Any plan or top-up activates your account too.
2. Open the Proxy Manager
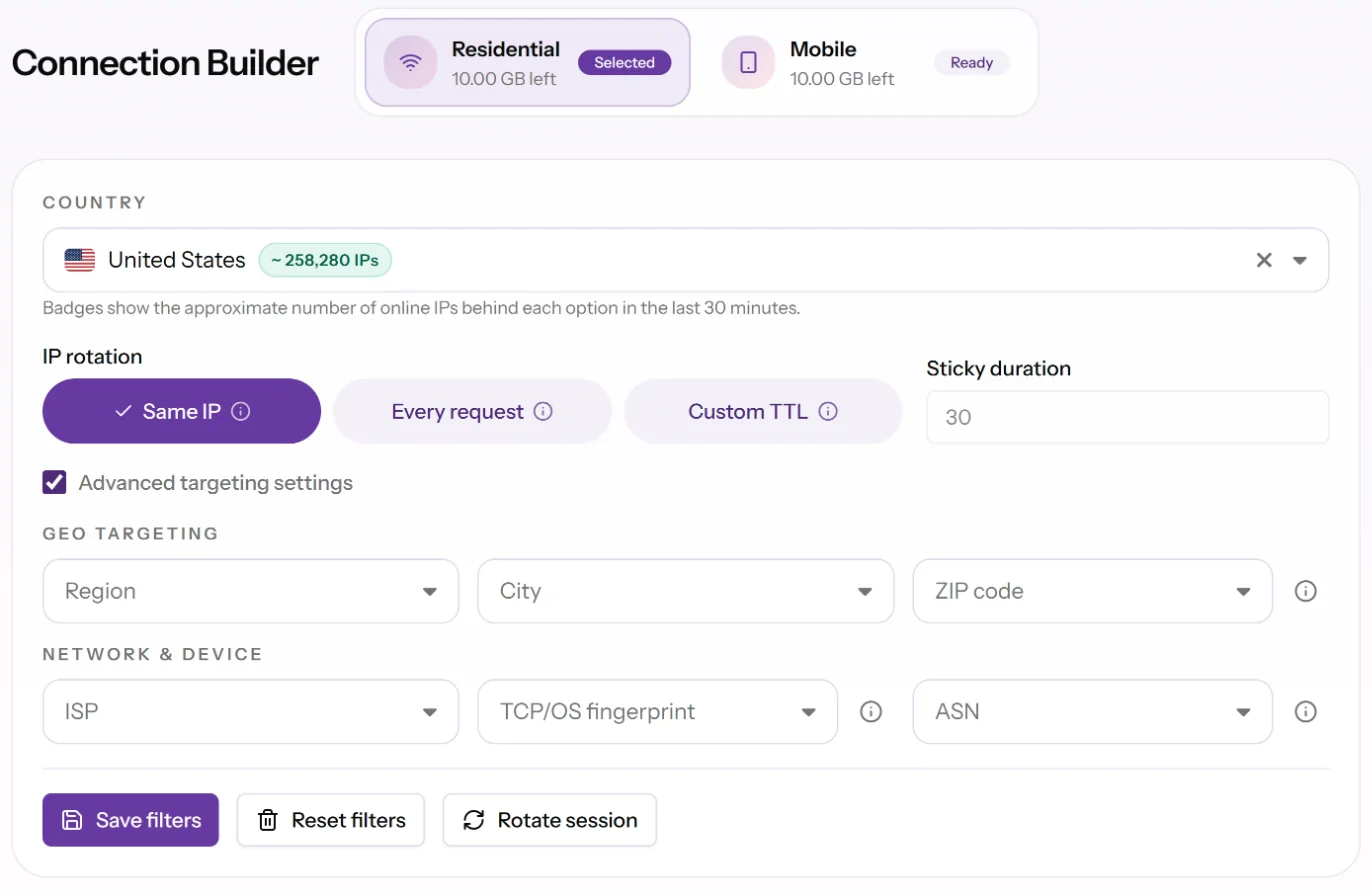
In your dashboard, open Proxy Manager. In the Connection Builder:
- Choose the Residential or Mobile tab.
- Choose a country. Region, city, ZIP code, ISP, ASN and OS fingerprint are under the advanced targeting settings.
- Choose an IP rotation mode: Every request (a new IP on each connection), Same IP (a sticky session) or Custom TTL (a new IP on a timer you set).
3. Copy your connection details
| Field | Value |
|---|---|
| Host | v2.proxyempire.io |
| Port | 5000 |
| Username | Shown in the Connection Builder. It holds your targeting and session settings, so copy it again after you change them. The Residential and Mobile tabs each have their own username and password. |
| Password | Shown in the Connection Builder. |
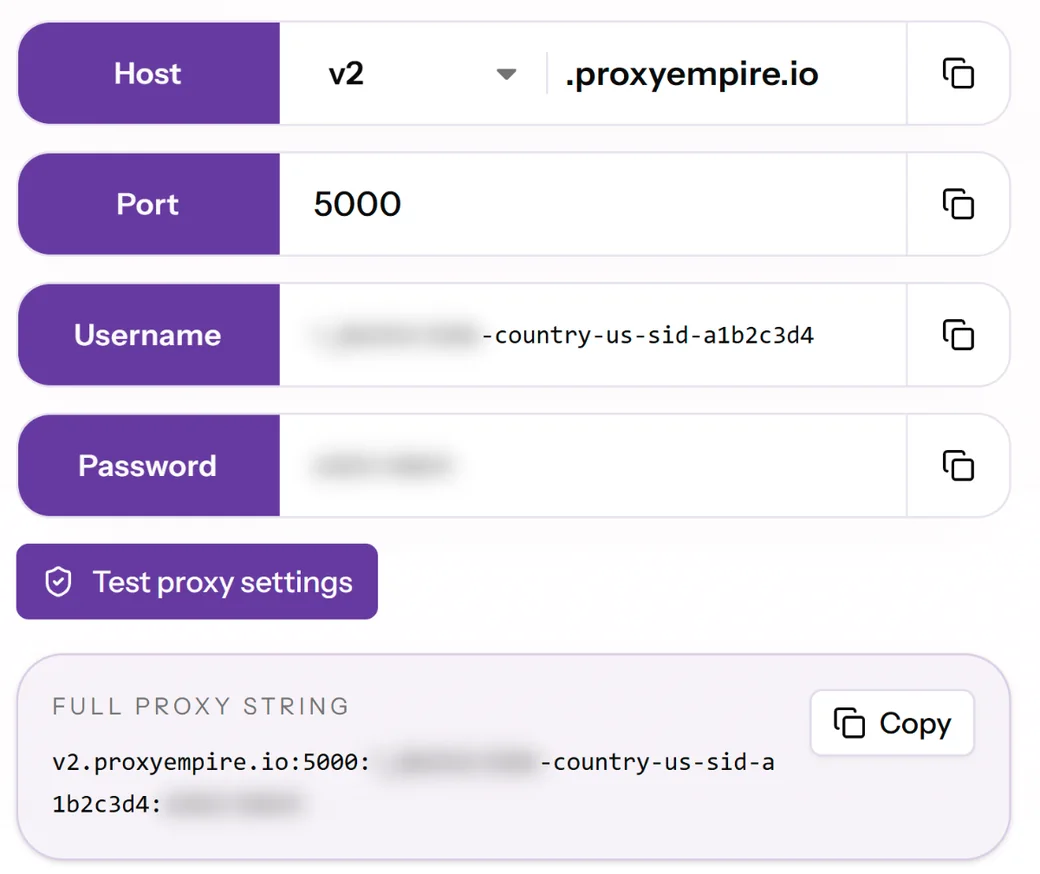
You can also copy the Full proxy string, or generate a Proxy list of many endpoints in formats such as host:port:user:pass. There is no IP whitelisting: the username and password work from any device or network.
Keep your username and password private. Anyone who has them can use your bandwidth.
4. Send a test request
Replace USERNAME and PASSWORD with your own values. The reply shows the proxy’s IP address and country, not yours.
# cURL: a new IP in the United States on each connection
curl --proxy "http://USERNAME-country-us:PASSWORD@v2.proxyempire.io:5000" https://ipinfo.io/json
# Python (pip install requests)
import requests
proxy = "http://USERNAME-country-us:PASSWORD@v2.proxyempire.io:5000"
print(requests.get("https://ipinfo.io/json", proxies={"http": proxy, "https": proxy}).json())The Proxy Manager has the same example for cURL, Python, Node.js, PHP and Go, filled in with your login, and a Test proxy settings button that checks the connection for you.
5. Use it in your software
- Browsers and anti-detect browsers: follow the integration guides, or use our free Chrome extension.
- Phones: see the Android and iPhone guides.
- Scripts and scrapers: use the proxy string from step 4. SOCKS5 uses the same host, port and login: change
http://tosocks5h://. - AI agents: connect the ProxyEmpire MCP server in Claude, ChatGPT or Cursor.
If the test fails
- 407 Proxy Authentication Required: the login is wrong. Copy the username and password again from the Proxy Manager.
- No reply from one website only: it may be on the blocked list.
- Anything else: see Why is my proxy not working? or ask on the 24/7 live chat.
Next steps
- Connection referenceEvery host, port and username parameter
- Sticky sessionsKeep one IP across many requests
- Targeting optionsCountry, city, ZIP, ISP, ASN and OS
- APIBuild proxy lists and read usage by code