Why ParseHub
ParseHub is an easy-to-use data extraction tool capable of scraping any interactive website.
You can gather and save data from any JavaScript and AJAX page, or you can acquire data from sophisticated and slower websites.
To scrape your data, you can easily direct ParseHub to scan through fields, access drop downs, log on to websites, navigate on mapping, and manage sites with endless scrolling, tabs, and pop-ups.
This tool was created to assist software developers, data scientists, or marketing professionals in capturing data from JavaScript and AJAX websites. Automatic IP rotation, HTML, attribute extraction, scheduled scraping, and other functions are among the platform’s highlights. On a single interface, teams may share resources using JSON, CSV, Microsoft Excel documents, Google Sheets, and Tableau.
Integrate Proxies with Authentication
Configuring proxy settings in ParseHub may look complex at first, but is a rather simple procedure.
Before you begin, go to the Proxy Manager in your ProxyEmpire account. Generate your proxy details by choosing your targeting criteria like Country, Region, and ISP.
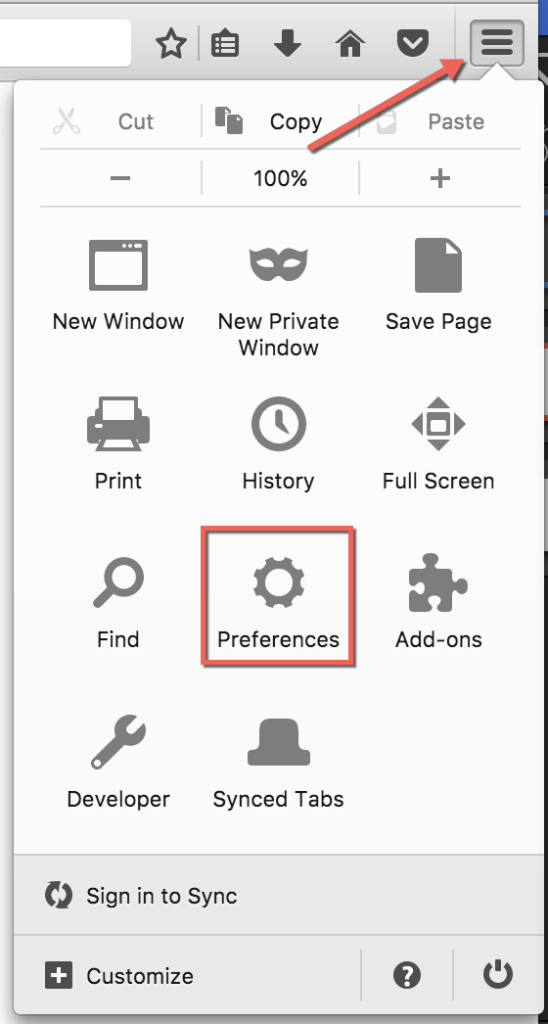
1) Open ParseHub’s built-in Firefox browser and go to Preferences.

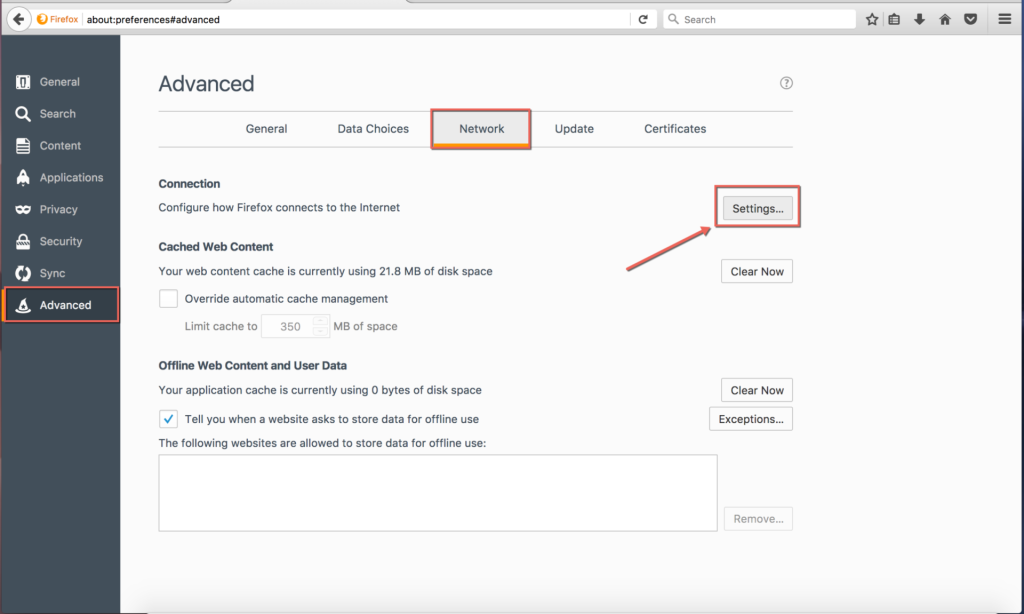
2) From this window, choose the Advanced option in the sidebar, then the Network tab, and finally Settings.

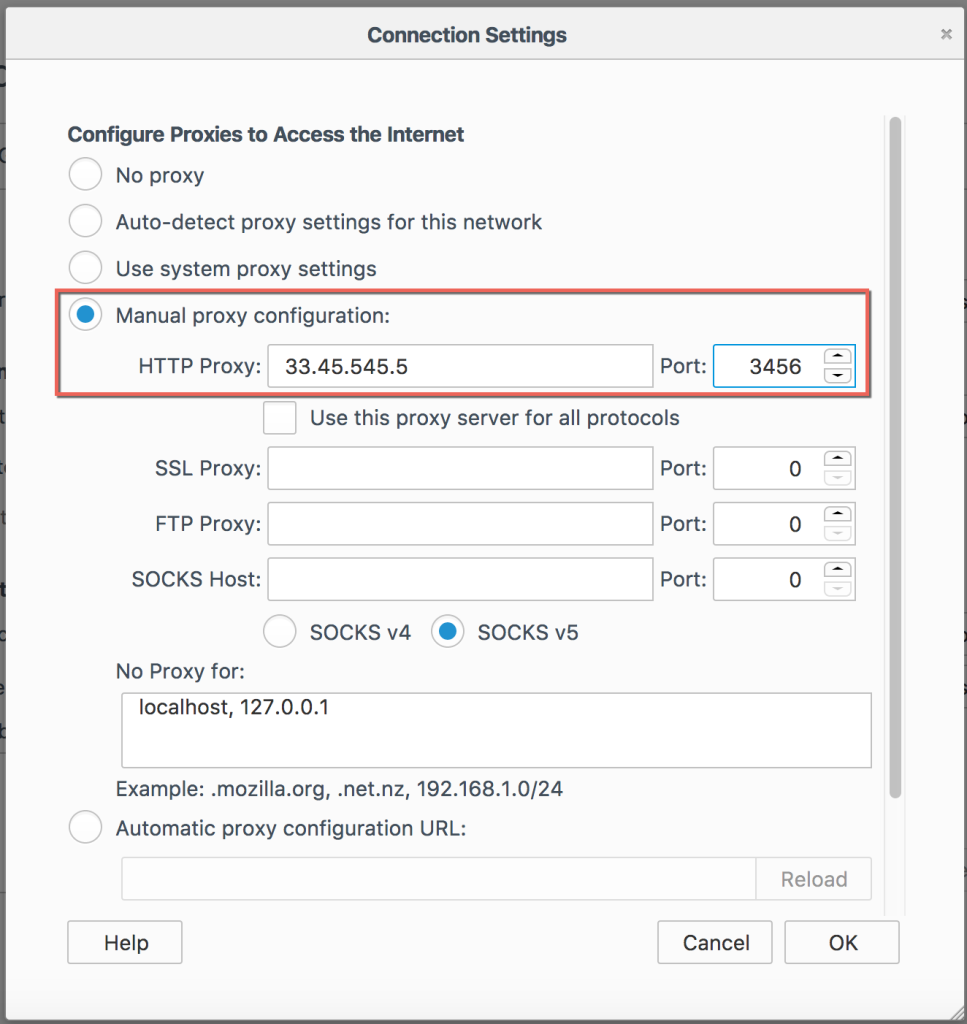
3) Select the “Manual proxy configuration” button. In the “HTTP Proxy” field add the IP address of your proxy and in the “Port” field add your proxy port number. Then click the tick on “Use this proxy server for all protocols”

4) Open a new tab in the browser, start browsing and you should get a prompt for authentication:

Authentication required: the proxy moz-proxy://33.45.45.45:9000 is requesting a username and password. The site says “thisIsYourRealm.net“
Anything shown between the double quotation marks (“”) is your realm and should be copied. In this example this is thisIsYourRealm.net
Take note of your proxy and append a semicolon (“:”) with your realm to the end. As an example:
33.45.45.5:9000:username:password:thisIsYourRealm.net
5) Launch ParseHub Project and go to the “Settings” menu.

6) Click the checkbox next to “Rotate IP Addresses” under the “Settings” menu, and the “Custom Proxy” text field will appear at the bottom of the screen.

In the format outlined above, paste your proxy together with the realm you got in the previous step of this guide:
If you have a list of proxies to rotate, you can add each new proxy to the “Custom Proxies” field on a new line.


